BIND 9, and why DNSSEC might not work on your resolver

Recently I encountered the following error in /var/named/data/named.run on a freshly installed BIND 9 resolver in an AlmaLinux 9 container on podman when dnssec-validation was set to yes or auto in /etc/named.conf:

managed-keys-zone: Unable to fetch DNSKEY set '.': timed out

The tl;dr of this is try running named with the -4 argument to force it to only use IPV4. This can be set in /etc/sysconfig/named in the OPTIONS variable. Keep reading to understand the troubleshooting that led to a fix.

The root cause was not immediately clear so I started working my way through what could cause this. /etc/named.root.key was from the package and matched IANA’s active root signing key. The permissions on /var/named/dynamic/ matched the named process runner and the managed keys files were being populated with some data – dumping the .jnl file with named-journalprint didn’t show any clear problems, but I’m not familiar with what it should actually look like.

Checking the key status with rndc pointed to there being an issue with trust however

# rndc managed-keys status
view: _default
next scheduled event: Wed, 21 Aug 2024 12:34:56 GMT

    name: .
    keyid: 20326
        algorithm: RSASHA256
        flags: SEP
        next refresh: Wed, 21 Aug 2024 13:34:56 GMT
        no trust

At this point it was time for the typical Google blackhole of no valid answers. It seemed like many people gave up and just disabled DNSSEC validation to get around it. At this point I decided to tcpdump the named process starting

# tcpdump -i any -n -vv port 53

This ultimately showed BIND reaching out via IPV6 with no responses received. IPV6 is not something available on this system, so not explicitly configuring the container host to disable it could have contributed to this issue.

Note that stopping BIND from listening on IPV6 addresses is not enough – you must pass the -4 flag to stop this behaviour.

How to run and use VoiceCraft on Windows

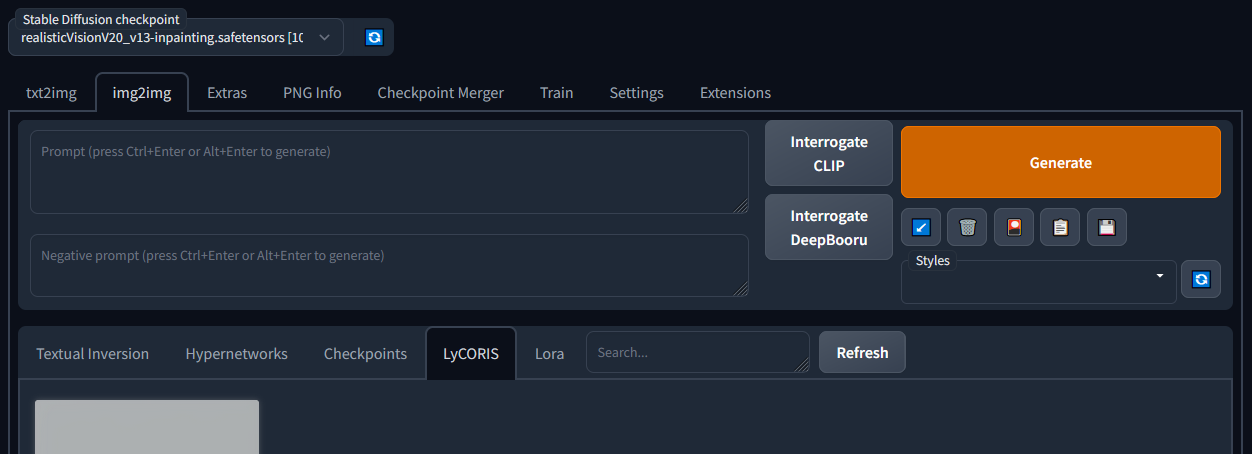
VoiceCraft is a text to speech (TTS) and speech editing project written by Puyuan Peng which provides some interesting results for voice cloning with just a few seconds of input data. If you’re looking to try this tool out yourself but have hit some hurdles, I’ve created this guide which walks you through its use on Windows using Docker. You should have a little familiarity with Python to be able to use this tool.

Continue reading

How to download PDB symbols in Ghidra

About the only article I can find that references downloading symbols from a remote symbol server in Ghidra doesn’t seem to be current with at least version 10.4. This feature was added in the 10.0 release but it seems to have changed slightly since then.

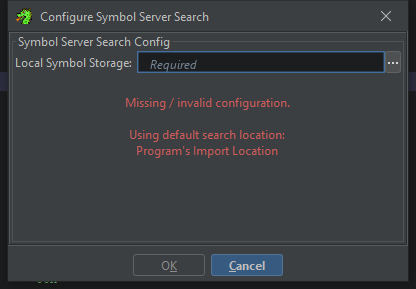
With CodeBrowser loaded you’ll first need to configure your Local Symbol Storage directory using Tools -> Symbol Server Config.

Unconfigured Symbol Server Search dialog

Once you’ve selected your Local Symbol Storage directory you’re then able to add a remote symbol server via Additional Search Paths by hitting the + button. After clicking Ok you can then download symbols via File -> Load PDB File…, click Advanced > >, and then click Search All. If a PDB is available it will show up in the PDB Search pane, and then you can click Load to trigger the download.

How to fix certain H264 MP4s that cannot be imported into DaVinci Resolve

Recently I came across a set of video recordings that DaVinci Resolve would not import. According to its Media Storage viewer, the folder they were in was empty, except for one of the videos which was suspicious to me. These recordings played fine in multiple media players but most suggestions I could find for resolving the issue via Google either blamed the user, suggested they have to upgrade to DaVinci Resolve Studio, or worst of all – transcode the videos to a compatible format. Transcoding is time intensive and lossy, and Studio costs money, so let’s try to avoid either of those.

There are a couple ways to identify whether this is going to work for your video files.

Continue reading

Fixing Taiko no Tatsujin: The Drum Master! on Windows

Taiko no Tatsujin’s sign in error on its title screen

Microsoft recently made BANDAI NAMCO’s “Taiko no Tatsujin: The Drum Master!” (TnT) available on Xbox for Windows – included with the GAME PASS no less – but it came with an important catch: it doesn’t work. Starting the game leaves you stuck at the title screen with a message, “After signing into a Microsoft account, please restart the game.”

Sitting around waiting for Microsoft to fix this is one option, but another is fixing it ourselves. The game is built using Unity and Microsoft allows you to set the game as Moddable opening the door to all sorts of opportunities. Since the game is a .NET application written in C#, there’s already a swath of utilities out there that make this relatively straightforward (and free!).

We’ll make use of the following roster of applications:

This won’t be an intensive tutorial on everything you need to know to go from idea (i.e., fixing sign in) to execution (i.e., writing a patch), but it should prime your mind for the kinds of things that are possible. If you want to skip to the end, there is a link to the GitHub repository which also includes a pre-compiled binary for use with BepInEx to fix the game.

Continue reading

Solving WiFi connectivity issues for Wyze Cam v3 on Bell Home Hub 3000

If you’re a Bell customer in Canada trying to use a Wyze Cam v3 on your Bell Home Hub 3000 you may have experienced issues with it connecting to your WiFi during setup. In a standard Home Hub 3000 configuration, the Wyze Cam will report that it “Cannot connect to local network”. In order to fix this, you’ll need to separate your 2.4 GHz and 5.0 GHz SSIDs. This will have a negative impact on the ease of use for your WiFi when dealing with older devices, but it is the only way to get the Wyze Cam v3 to work properly.

Continue reading

Performance monitoring IBM DS SANs with Cacti

This post is a draft that has sat unfinished since 2013. Some information here may still be useful even though it is incomplete. Since I don’t intend to finish rounding out the Cacti configuration information at any point I thought I would publish it in its current state as someone may find the SAN statistic gathering part useful as it is.

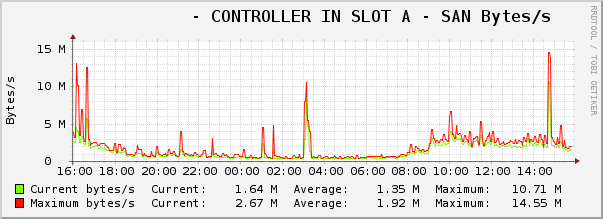
I’ve been using the IBM DS series of SAN hardware for a number of years now and one of the things that always stood out was its lack of SNMP support for performance monitoring. There’s also differences in the GUIs for different model versions, some providing more functionality than others. While the DS3500 series provides short term monitoring capabilities through the IBM DS Storage Manager, the DS3400 series does not. What can we do about this?

Recently I stumbled upon a German blog post that described how to use the SMcli utility which is provided with Storage Manager to get the job done. The method described is a good starting point, but the implementation is lacking. Cacti is capable of a lot but sometimes it can be confusing to figure out how to do it. Using the knowledge gained from that post I’ve put together a more robust solution for monitoring the DS series of SANs with Cacti.

I can confirm that this works with the DS3400 and DS3500 SAN hardware. Since my starting point was from information for the DS4800, I believe it should function with many other models. If your Cacti polling is not set to 5 mins, some changes will be necessary. Any code examples contained within this post were written for a FreeBSD system, and may require some modification to run on another operating system.

Continue reading

How to use Cloudflare DNS for the Letsencrypt challenge with Bitwarden’s automatic setup

Bitwarden’s automatic setup script allows you to secure your server’s HTTPS connections using Letsencrypt via certbot but it does not provide control over the challenge type used to issue the certificate. If you wanted to use a DNS challenge and take advantage of the Cloudflare API for example, you’ll need to make some changes to the scripts.

As your docker user, follow the standard steps from the TL;DR guide, which I’ve linked to and copied here just for completion. I do not recommend copy and pasting commands like this without being sure of what you’re executing.

$ curl -Lso bitwarden.sh https://go.btwrdn.co/bw-sh && chmod +x bitwarden.sh
$ ./bitwarden.sh install

You can CTRL+C to stop the install once it begins prompting you for input. Edit the bitwarden.sh script and comment out the downloadRunFile calls (e.g., at the time of writing lines 109 and 118)

You can then download and apply this diff to ~/bwdata/scripts/run.sh

Once complete the standard install can be reinitiated

$ ./bitwarden.sh install

Installing CorentinJ’s Real Time Voice Cloning project on Windows 10 from scratch

Corentin Jemine (CorentinJ on GitHub) has a project called Real Time Voice Cloning available on GitHub that uses deep learning to take a voice as input and synthesize speech using its properties – in essence creating a “deep fake” of audio. Setting things up from scratch to get it working on Windows 10 involves using specific versions of software and can be a bit difficult for new users to figure out. I intend this as a reference guide for doing just that – assuming you are starting with a fresh Windows 10 install. This does not provide any instruction for using the cloning software once setup.

Continue reading