Microsoft recently made BANDAI NAMCO’s “Taiko no Tatsujin: The Drum Master!” (TnT) available on Xbox for Windows – included with the GAME PASS no less – but it came with an important catch: it doesn’t work. Starting the game leaves you stuck at the title screen with a message, “After signing into a Microsoft account, please restart the game.”
Sitting around waiting for Microsoft to fix this is one option, but another is fixing it ourselves. The game is built using Unity and Microsoft allows you to set the game as Moddable opening the door to all sorts of opportunities. Since the game is a .NET application written in C#, there’s already a swath of utilities out there that make this relatively straightforward (and free!).
We’ll make use of the following roster of applications:
This won’t be an intensive tutorial on everything you need to know to go from idea (i.e., fixing sign in) to execution (i.e., writing a patch), but it should prime your mind for the kinds of things that are possible. If you want to skip to the end, there is a link to the GitHub repository which also includes a pre-compiled binary for use with BepInEx to fix the game.
We’ll use dotPeek to investigate the managed DLLs in the TnT game. If you have the game installed to its default location they will be in C:\Program Files\ModifiableWindowsApps\Taiko no Tatsujin\Taiko no Tatsujin_Data\Managed. We’ll want to look in Assembly*.dll files for the game code and the size of Assembly-CSharp.dll (2393KB) makes it a good bet, so we’ll start there by opening it in dotPeek.
It’s clear that there is tight integration between games and Microsoft Xbox services, so while I haven’t personally delved much into Xbox games, I imagine that a lot of code surrounding sign in activity is provided through an SDK. Microsoft provides something they call their Game Development Kit (GDK) and after disassembling our target we see a list of namespaces, including one called Microsoft.Xbox and beneath that, a class called GdkHelpers.

Right now the idea is to browse around the code and look for something that’s going to point us to the sign in code but thanks to some luck, we’ve immediately hit the nail on the head (this was honestly the first place I looked). Within GdkHelpers we have the SignIn() member pointing to the member implementation SignInImpl. Within that code, we have a call to a GDK function SDK.XUserAddAsync with the following arguments:
isSilently ? XUserAddOptions.AddDefaultUserSilently : XUserAddOptions.None, new XUserAddCompleted(this.AddUserComplete)We can find the an explanation of XUserAddAsync in the GDK documentation, and an explanation of the parameters for XUserAddOptions. My quick gut check on the arguments being passed based on the docs is that we could be using XUserAddOptions.AddDefaultUserAllowingUI instead of XUserAddOptions.AddDefaultUserSilently and likely get what we want out of the game. Seems easy enough but there is a call to AddUserComplete which is a private method.
With my limited knowledge of BepInEx, I don’t think it’s easy to make a call to that without some reflection tricks so what we can do is look at instead patching SDK.XUserAddAsync to always use the XUserAddOptions.AddDefaultUserAllowingUI option. It’s not the cleanest way of doing it, but it’s just a temporary patch until the inevitable official fix.
Let’s call on BepInEx now to do the dirty work, following the install documentation’s initial steps. You’ll download the latest 5.4.x release, and extract it to the game’s root folder which is C:\Program Files\ModifiableWindowsApps\Taiko no Tatsujin by default. Launch the game via the Xbox app to generate the initial BepInEx configuration files and then close TnT.
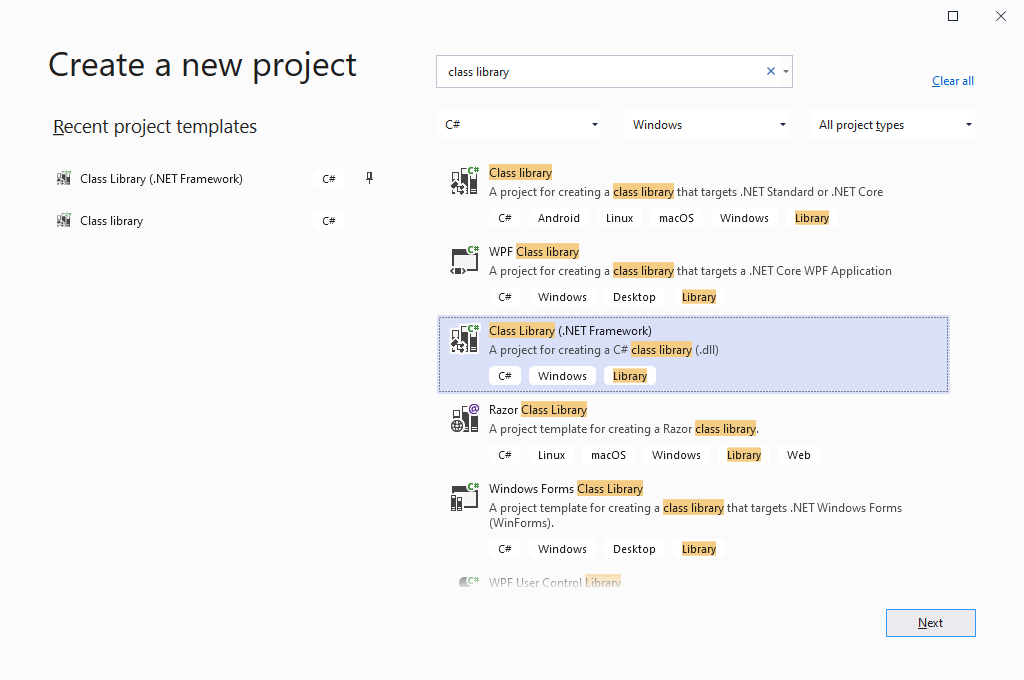
We’ll need to write our patch plugin now, so in Visual Studio create a Class Library (.NET Framework) project and target .NET 4.6.x
Once created, browse to your project’s source directory and create a Libs folder, then from the TnT game’s Managed folder copy these files into Libs
Assembly-CSharp.dllUnityEngine.dllUnityEngine.CoreModule.dllXGamingRuntime.dll
From the BepInEx core folder copy these files into Libs
0Harmony.dllBepInEx.dllBepInEx.Harmony.dll
In Visual Studio in the Solution Explorer panel on the right, right click References and Add Reference…, then browse to the Libs directory and add all the DLLs. From here we can create our patch. There is some typical BepInEx scaffolding that isn’t really in scope here, you’ll need to read the documentation for more detail. What we’re going to do here is create a HarmonyPrefix patch which runs before the original called method, allowing us to change the arguments that have been passed.
The relevant code really comes down to this simple block:
[HarmonyPatch(typeof(SDK), "XUserAddAsync")]
[HarmonyPrefix]
private static void SDK_XUserAddAsync_Prefix(ref XUserAddOptions options, XUserAddCompleted completionRoutine)
{
    options = XUserAddOptions.AddDefaultUserAllowingUI;
}The full project is available on GitHub, along with a precompiled DLL ready to use with BepInEx 5.4.18.
After you build a Release version of the solution, browse to the bin/Release directory of your Visual Studio Solution and copy the DLL (e.g., TaikoLoginPatch.dll if you’re using the GitHub code) to the C:\Program Files\ModifiableWindowsApps\Taiko no Tatsujin\BepInEx\plugins directory.
When you launch the game next, you’ll be greeted by the familiar Xbox Sign In window and be able to play TnT! After first launch, you can even remove the entire BepInEx plugin system from the game directory (do not forget to remove winhttp.dll and doorstop_config.ini)